A Visit From the Liberty Belle
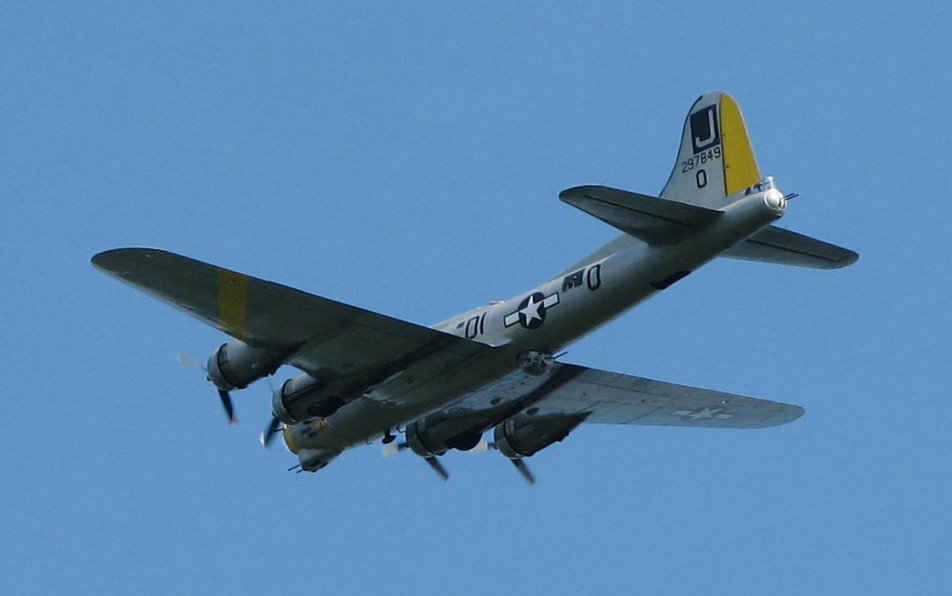
My wife and I were returning a couple of unused collars to the pet store when she looked out the window of the car and said, "What's that?" I looked through the sunroof of the car and here is an idea of what I saw:
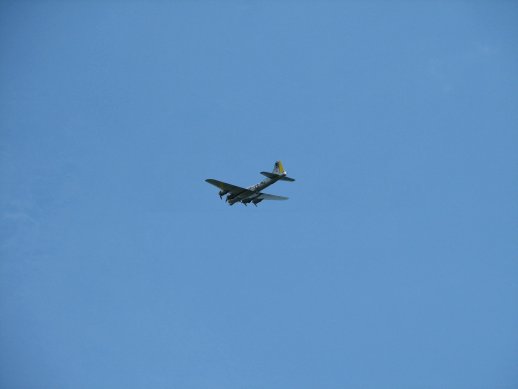
I said, "That, my dear, is a Boeing B-17G from World War Two." This plane was out tooling around the airspace of a neighboring town, and I had to know why. We ran some errands and then I made a few phone calls and tracked the plane down at one of the eight area airfields. I ended up dragging my poor wife down to the airport and met the plane between flights. She's the Liberty Belle, a B-17G built in 1945, and a plane with an interesting past. Right after she was built, she was sold for scrap, right off the end of the assembly line for $2000. The smelter owner who bought her looked her over, realized he had a complete plane, and resold her to Pratt and Witney aircraft engine corporation for twice what he paid. P&W used her for a few years as an engine test bed for a new turboprop engine, where she became famous as the five-engined B-17.
B-17 afficianados may notice that the nose is heavily modified and the cockpit is moved back by forty-two inches to acommodate the turboprop engine. P&W would take her up to altitude, fire up the turboprop, shut down the four main radials, and feather their props. When they were finished with her, P&W donated her to a museum in New England which hoped to restore her to her former condition. That turned out to be far too expensive for the museum to afford. Eventually she was broken in half when a tornado dropped an adjacent aircraft on her back. At that point, an association was formed in Georgia to buy her and restore her to original and flying condition. In 2004, after three million dollars worth of restoration, she returned to flight. She has spent the last four years on the road as a traveling memorial to the Eighth Air Force and to a particular aircraft, the original Liberty Belle, offering flights to anyone who can pony up $430. That may seem steep for a thirty-minute flight, but a sixty-year-old plane of this size is incredibly expensive to operate with passengers. Liberty Belle returned from a month-long European tour three weeks ago. Her crew chief told me her fuel stop in Newfoundland cost $10,000.
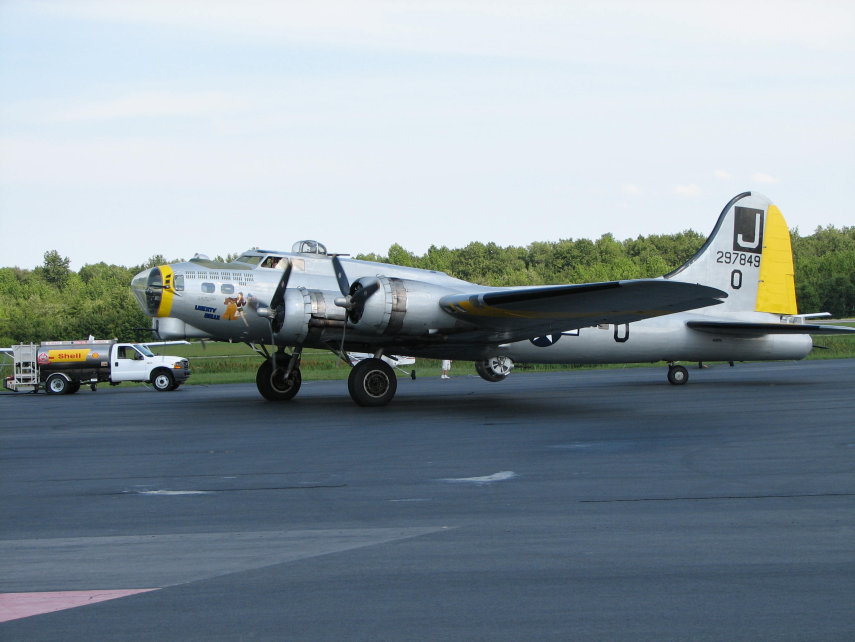
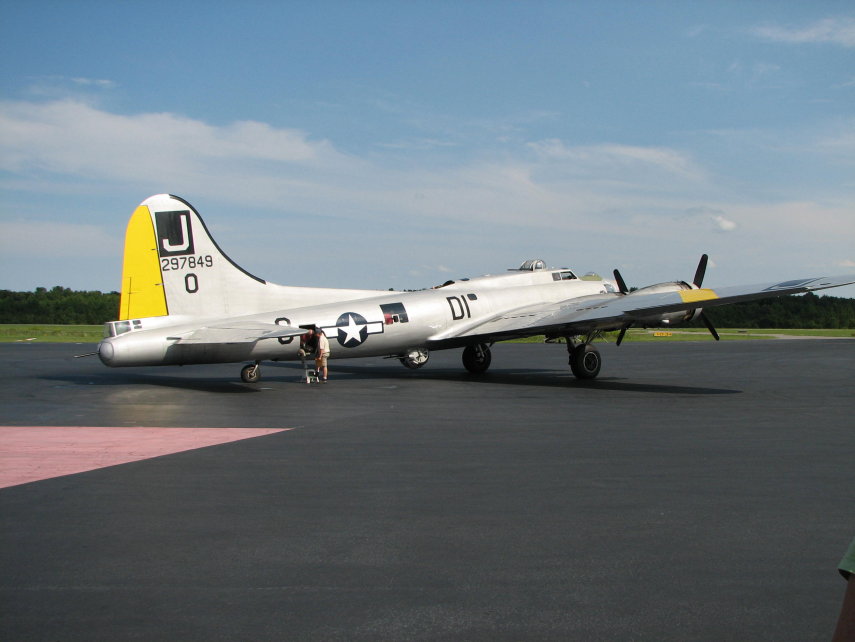
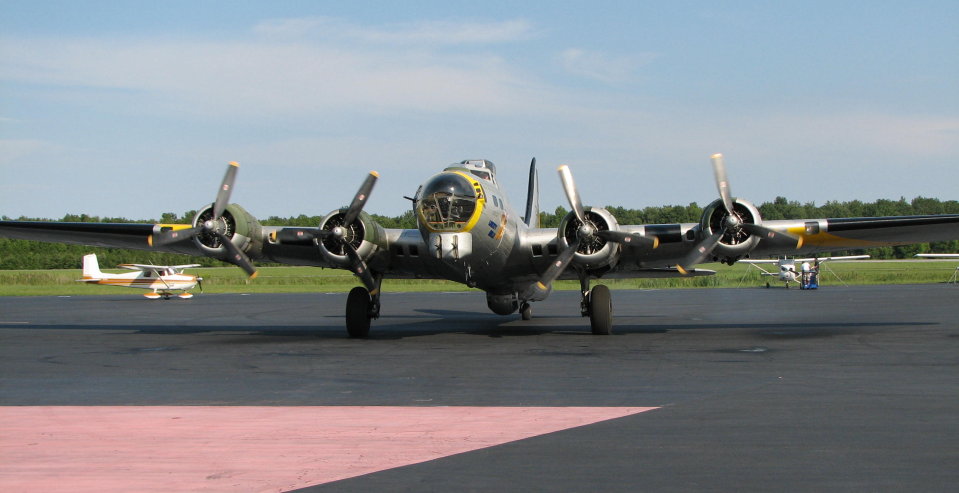
I caught up with her at Chesapeake Regional Airport on August 10th, 2008 and was able to do a walk-through of this beautiful restoration. First, a few shots as she taxied in and turned on the hard stand:
She shut down her fans to discharge and embark passengers:
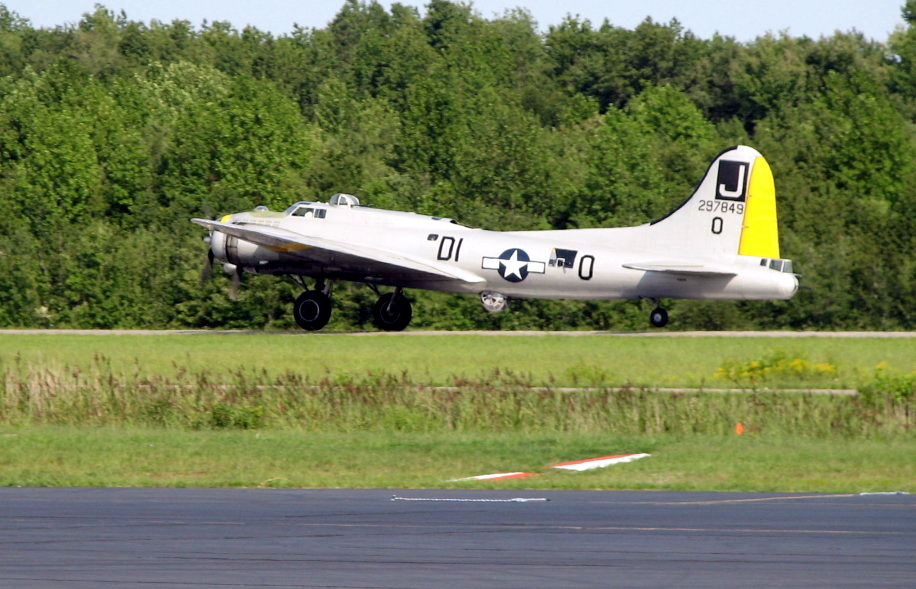
...and then taxied out and took the runway for another flight:
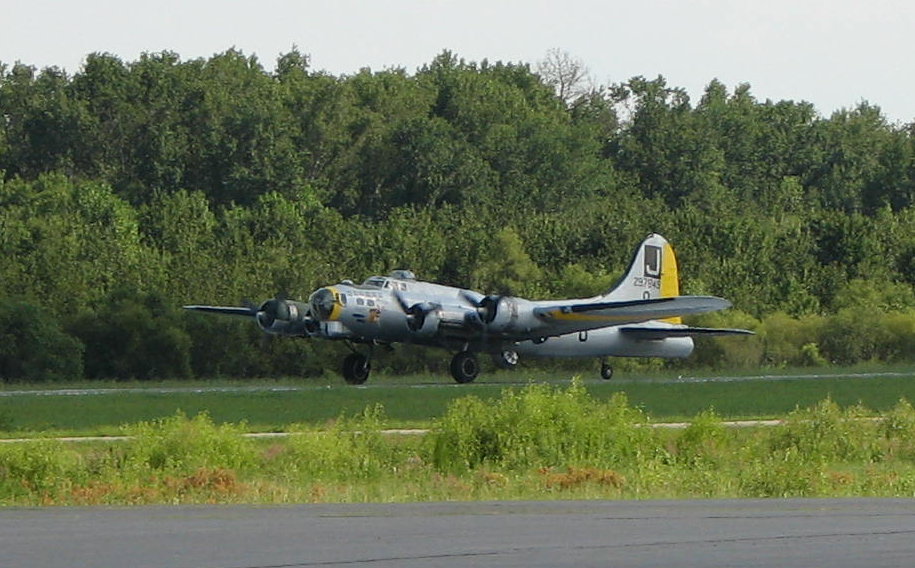
The tailwheel is just coming up:
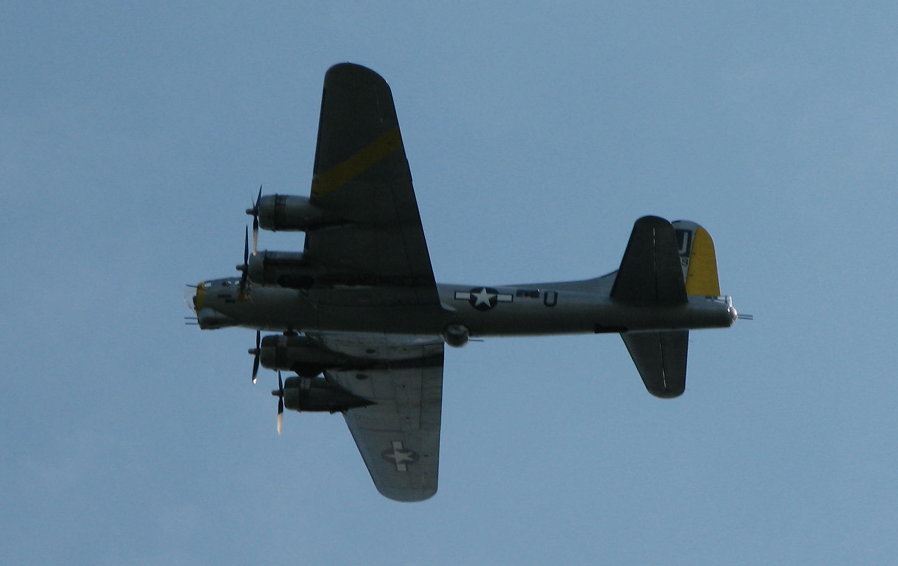
She circled the field and gave us a glamor shot or two:
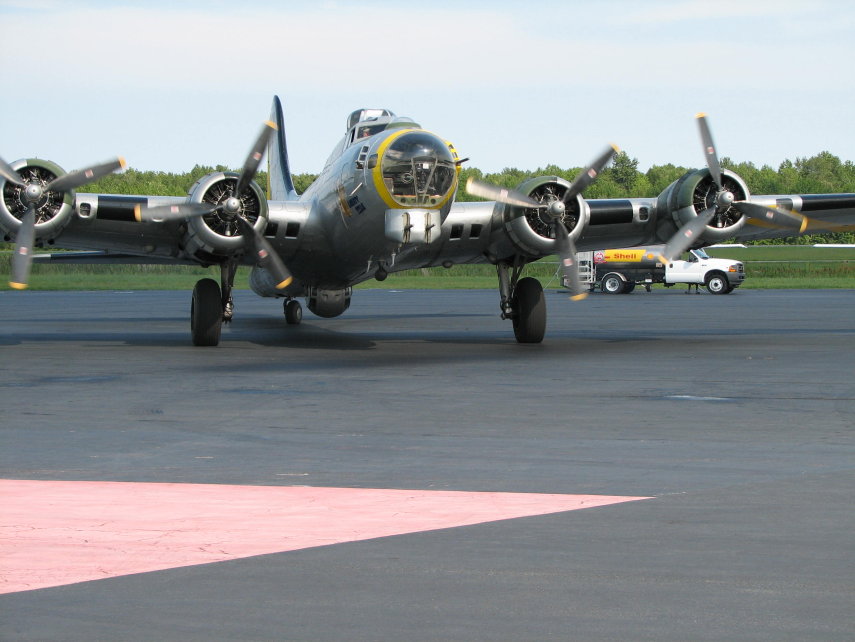
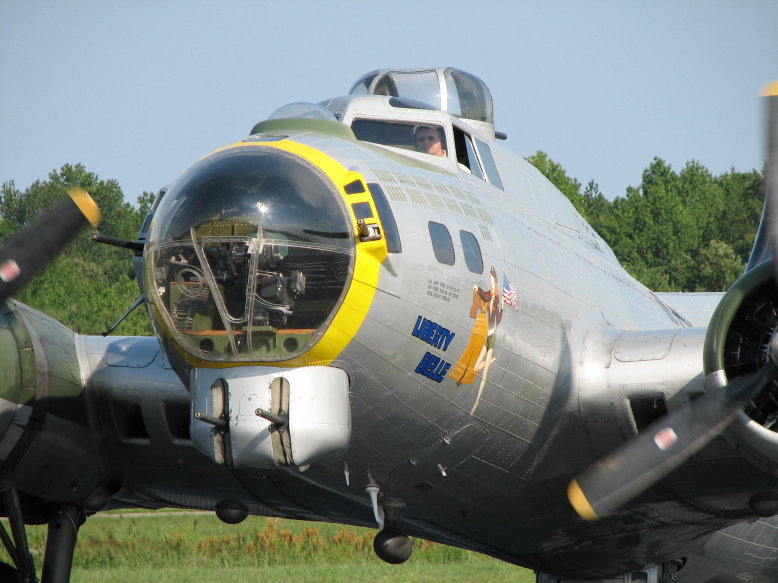
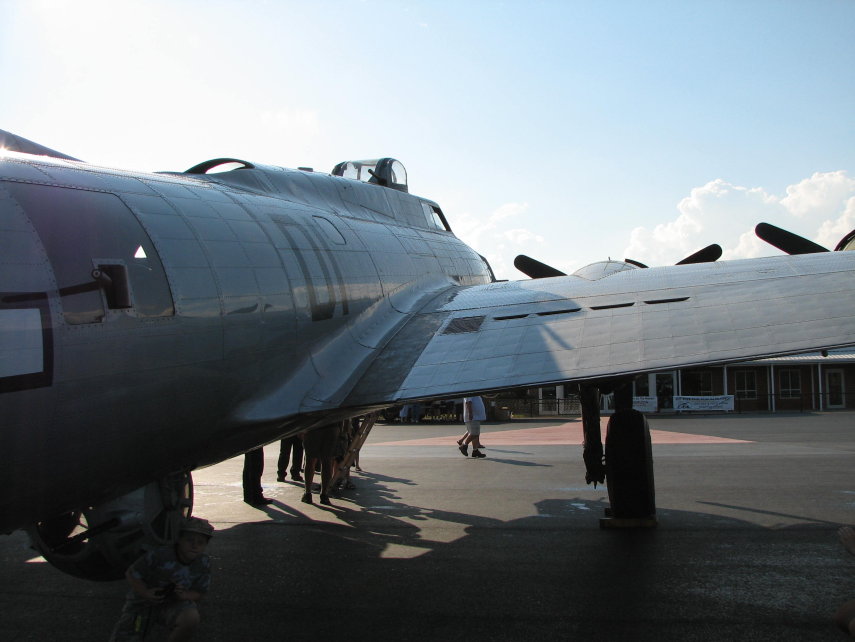
I spent the next thirty minutes talking to her crew chief about maintenance and operations of his plane, and then she returned and taxied back in. Above and behind the pilots is the top turret. If you look closely at the slots in the nose gun turret, you'll notice that the fabric boots protecting the guns from the weather are closed by zippers that close on each side of the barrels as they move. Also notice the astrodome on top of the nose used for astral navigation on long distance flights. A "bubble sextant" was used to obtain fixes.
As soon as she shut down, the engines began leaking oil. The crew chief placed a bucket under one to catch the drip. The open hatch was where I entered the ship.
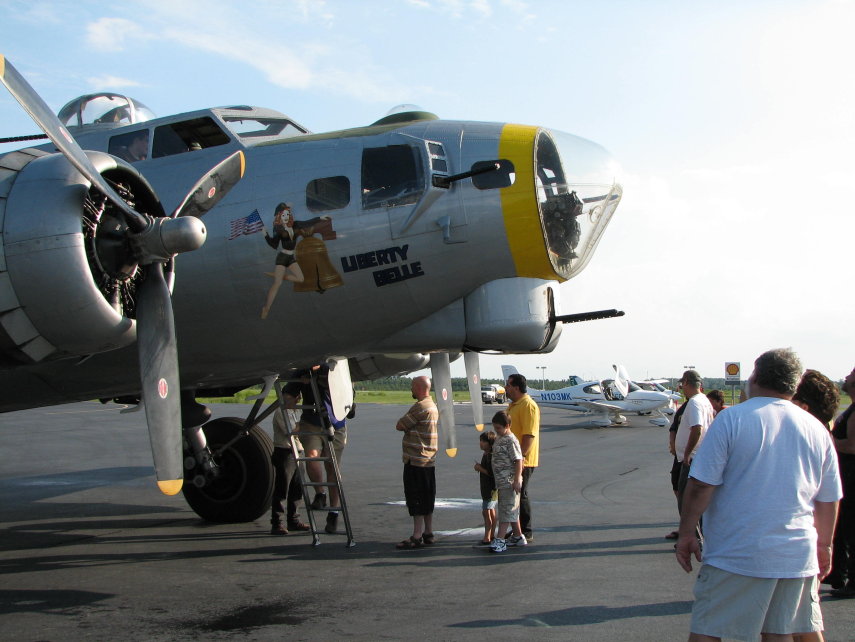
Before I boarded, I got an opportunity to shoot a closeup of her nose art, a reproduction of the original. The father of the head of the restoration association flew on the original Liberty Belle in WWII. Above the nose art are the "office windows" where the navigator sat.
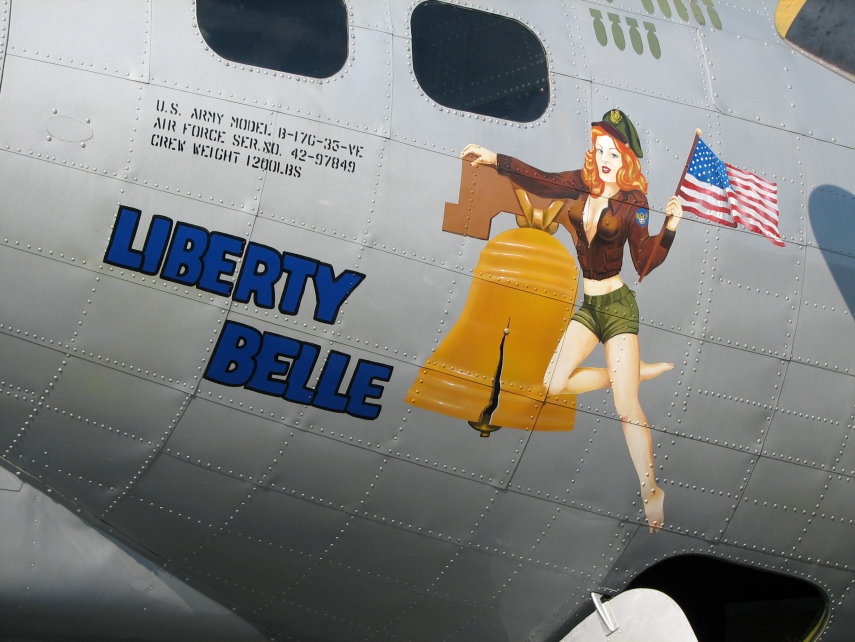
Before we go inside, let's get an idea of where the crew lived on the B-17. Here's a page from the crewman's manual for the B-17 showing where each crewman worked and how he bailed out. Notice that four crewmen bail out through the bomb bay. My interior pictures of the plane will go from nose to tail.
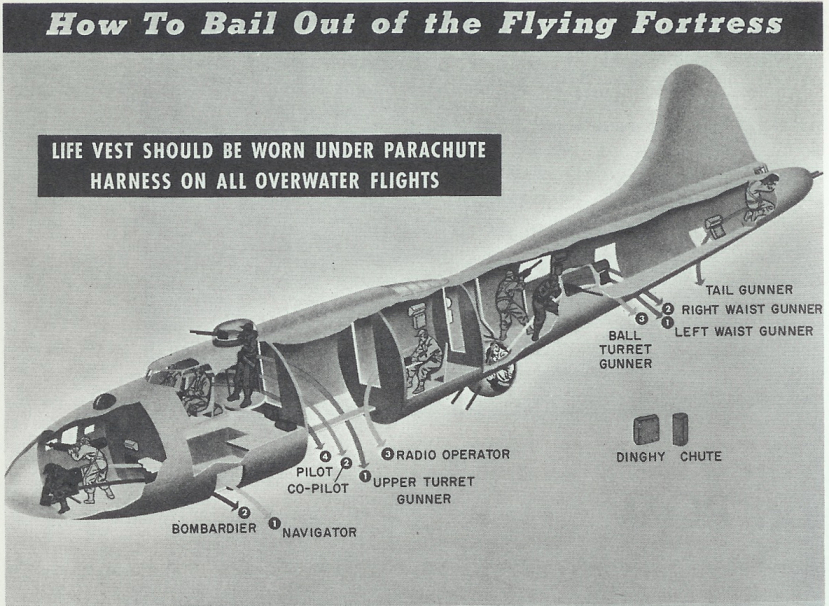
The B-17 was crewed by four officers (two pilots, navigator, and bombardier) and six enlisted men (top turret gunner/crew chief, radio man/gunner, ball turret gunner, two waist gunners, and tail gunner). In the tail position, the gunner sat on a bicycle seat at the base of the fourteen-foot rear stabilizer and rudder and operated two machine guns that protected the tail of the aircraft.
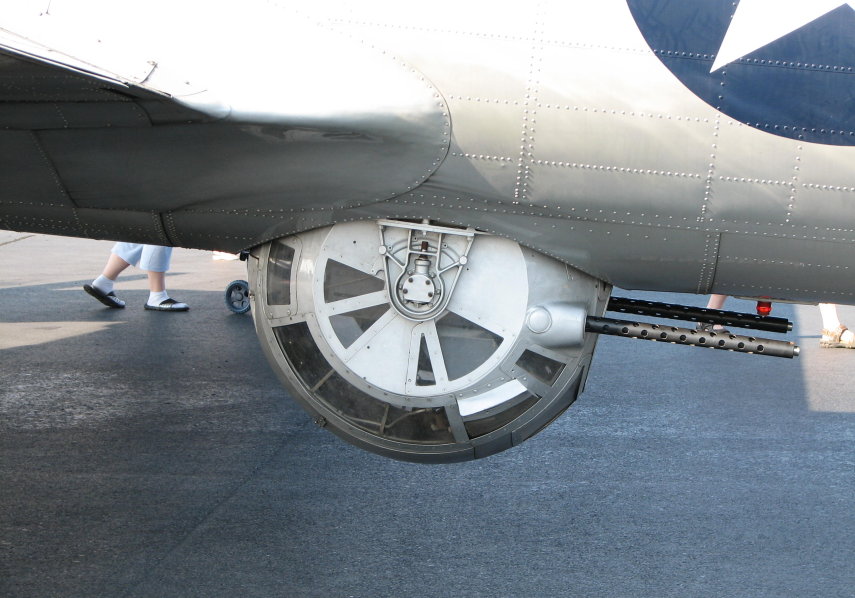
The Sperry Ball Turret was mounted in the belly of the aircraft, and was capable of a 360' field of fire to protect the bottom and sides. The operator rode inside, swivelling and swinging with the ball to aim the guns.
I entered the little vestibule underneath the flight deck via the nose hatch. By climbing on all fours through a little opening in the bulkhead to my left, I gained access to the nose, where the bombardier and navigator worked. This photo is looking forward from the vestibule to the nose. Please note that this photo is from the Liberty Belle web site.
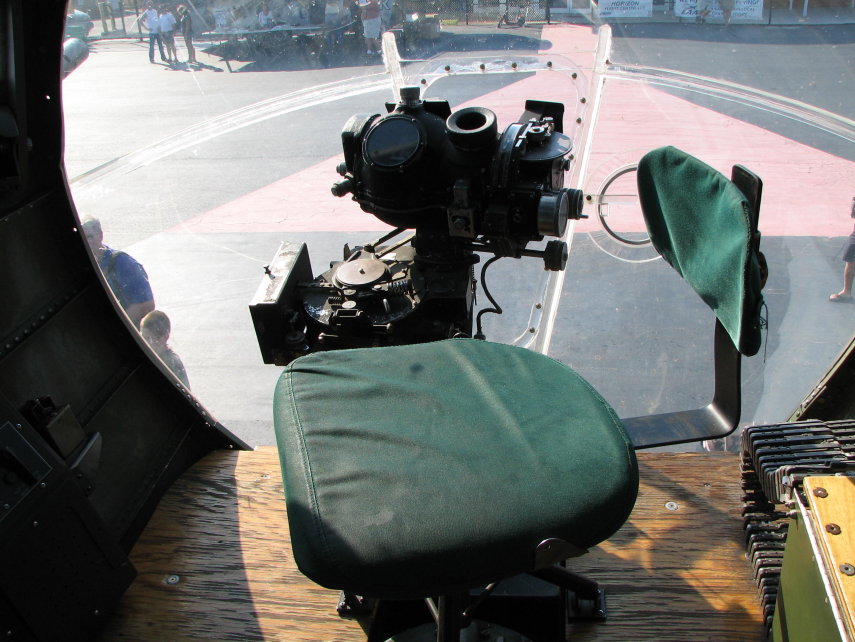
The nose was spacious, offering space for four people to stand. In the B-17G, the bombardier sat on a little "rostrum" above the chin turret mechanism and ahead of the navigator's position, and that's what we see here. From this excellent perch, often thought of as offering the best view in the Air Force, he operated the Norden bombsite. This compex and highly secret mechanical computer took into account winds aloft, altitude, and speed, and actually flew the plane on the bomb run via the autopilot system. During wartime it was loaded with an explosive charge and timed fuse the bombardier was expected to trigger if the plane went down. The bombardier also operated the powered chin turret to defend the plane from head-on attack. The chin turret was located directly beneath him. The navigator operated the pair of side machine guns when not working the numbers on the plane's navigation. I should mention that the Norden bombsite in the Liberty Belle is functional. Do you see that little circle in the plexiglas nose right behind the bombardier's seat? That is called a "snap vent." It was built in my hometown, Knoxville, Tennessee.
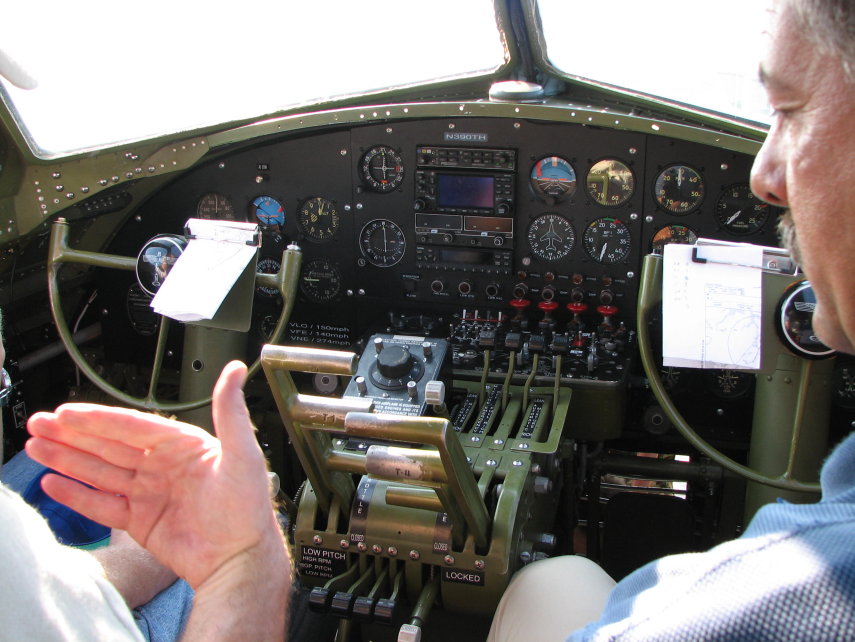
Heading back through the hatch and "vestibule" and then up through a slit, we climb onto the flight deck. A pilot and a co-pilot operated this aircraft. As it was being developed during the 1930s, there were questions of whether this plane was just too complex for two men to handle. Of course, there were virtually no automatic systems in the airframe or engines, so it was a handfull.
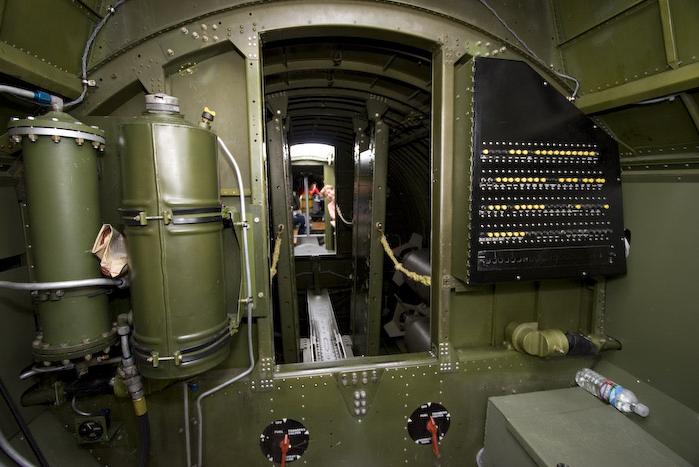
Looking aft on the flight deck, we see the hydraulic reservoir on the left, the circuit breaker panel on the right, and the fuel transfer valves below. Directly behind the pilots was a powered turret that provided 360' horizontal coverage, and vertical coverage through 90'. Most flying B-17s these days are operated with the bulky mechanism removed so that passengers can move around the cabin. Through the door is the bomb bay where the bomb load, the reason for the plane's existence, rode. Photo is from the Liberty Belle web site.
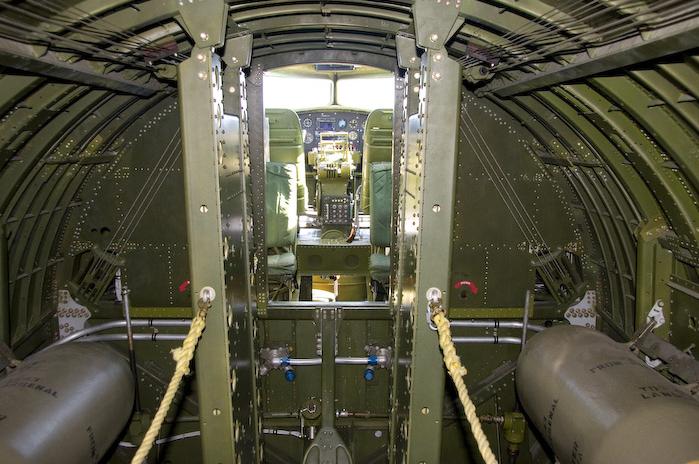
Here's a view looking forward in the bomb bay. The emergency manual cranks for the landing gear are marked with red arrows to show you which way to crank. if you look carefully into the cockpit, you can also see the autopilot panel at the base of the throttle stand. Below it is the slot opening to the vestibule. Photo is from the Liberty Belle web site.
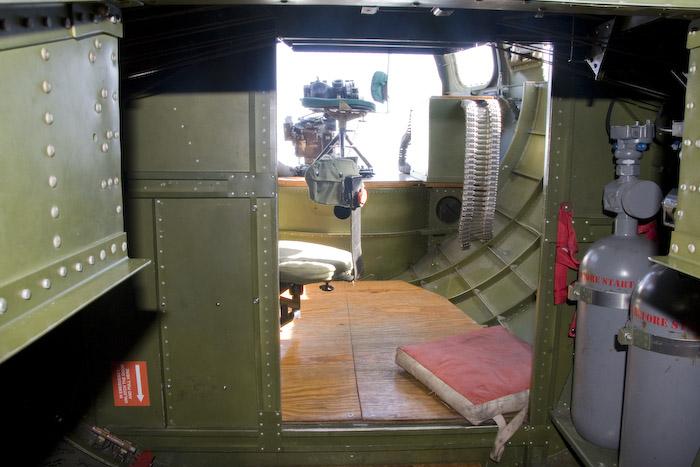
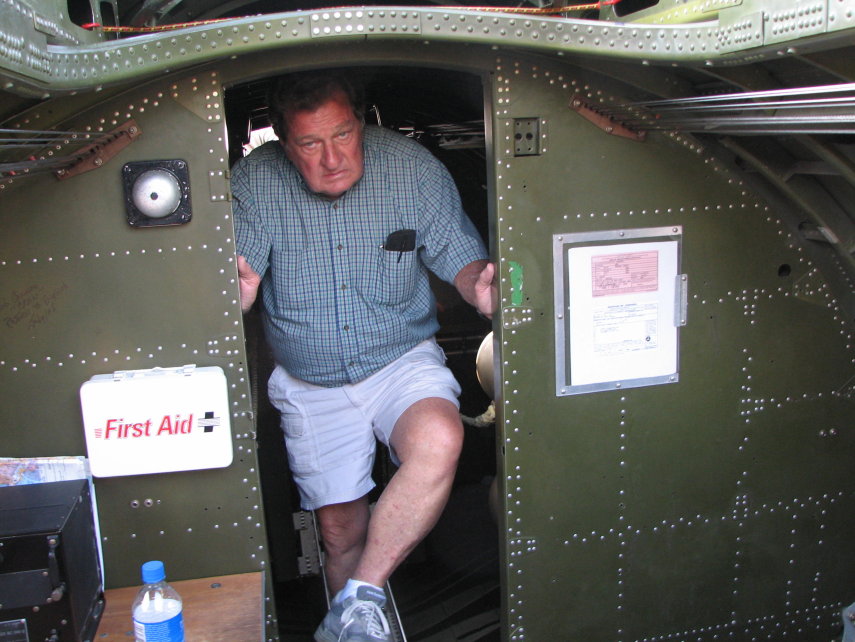
Heading aft, we step into the radio room. Besides the radios, there is a sliding skylight with a mount for another machine gun that covered the tail. This room was relatively spacious. That might seem abnormal except when you understand that all of the enlisted men came to this compartment and sat on the floor for take offs and landings. The radio man also had a window on each side overlooking the wings. Here I turn back towards the nose and catch a gentleman exiting the bombay to the radio room. This gentleman's brother was a waist gunner on a B-17. Notice the bailout alarm bell to the left of the door.
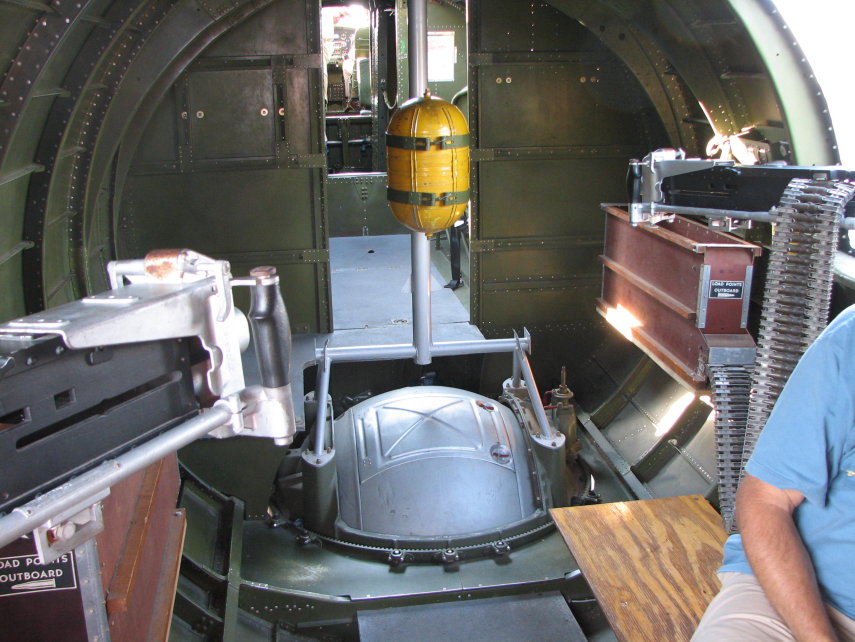
Continuing aft, we enter the waist of the aircraft, where three gunners worked. I've turned looking forwards to show the ball turret's mounting and traverse mechanism. The Liberty Belle crew are working on getting their ball turret working. Notice the breachs of the .50 caliber machine guns on both sides of the picture and the ammo case with feed belt on the right. Later marks of the B-17, such as this, featured staggered waist positions so that the two gunners didn't get in each other's way.
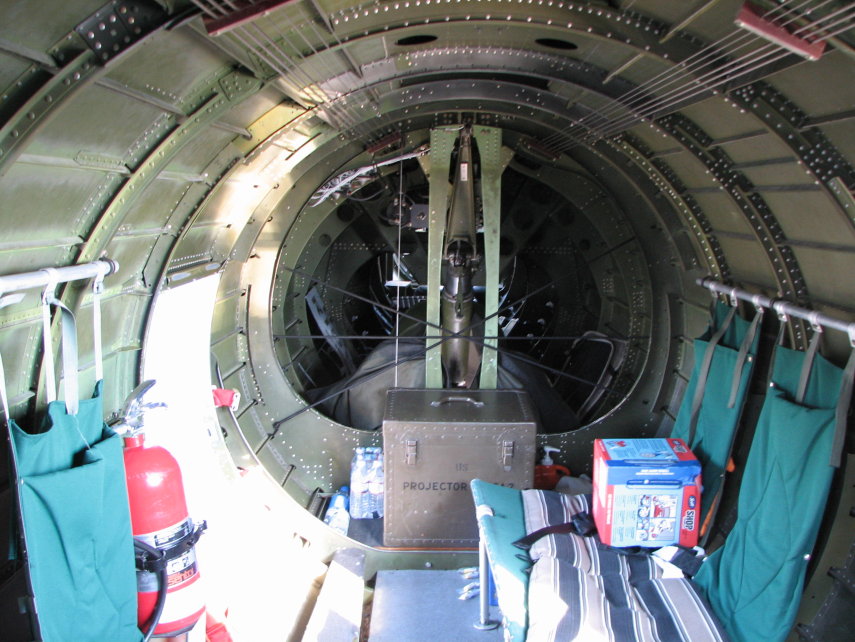
Here's a look aft in the waist position. Notice the control wires for the rudder and elevators traveling overhead. To the left is the crew exit door. Behind the central braces is the tail wheel mechanism and tail turret. This crew keeps a spare tailwheel stored back there as well. Every few years, Goodyear calls up all the owners of B-17s and says, "How many tires are you going to need for the next X years?" They then set up an assembly line and construct tires on the original molds. The crew chief told me that tail wheel tires are the first to go because of all the turning and scuffing. The main tires can be re-treaded.
Stepping out the exit door, I was greeted with another glamor shot over the wing, silhouetted by the sun:
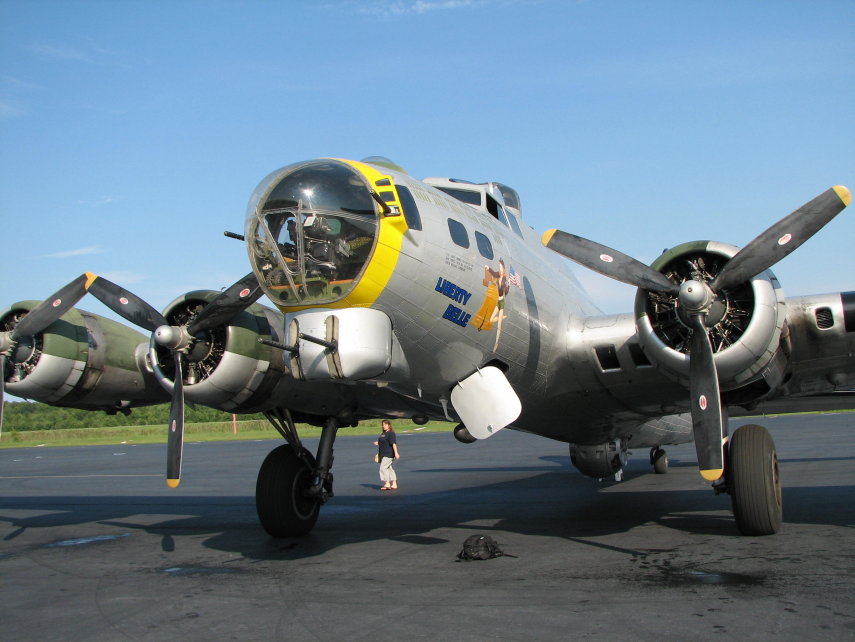
Here's a final shot of the nose, with humans for scale. If you go back to the previous pictures of the other side of the nose, you'll notice that the side-mounted machine gun on this side is offset from the one on the other side to make it possible for the two men in the nose to operate them without getting in each other's way.
Liberty Belle Home Page
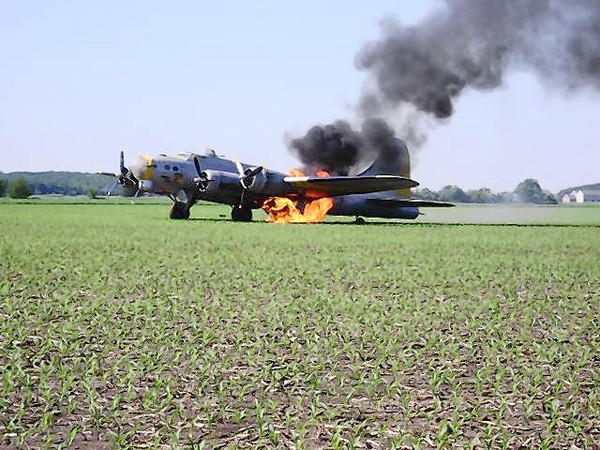
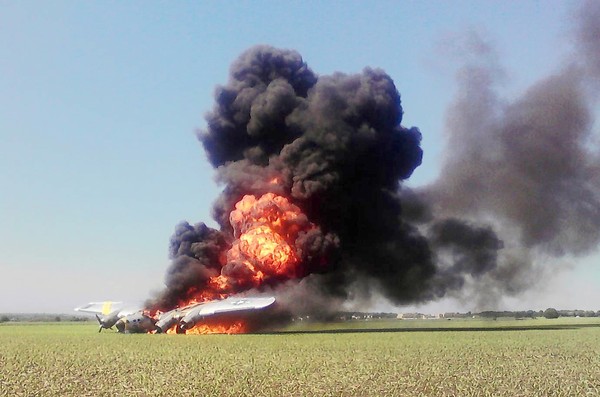
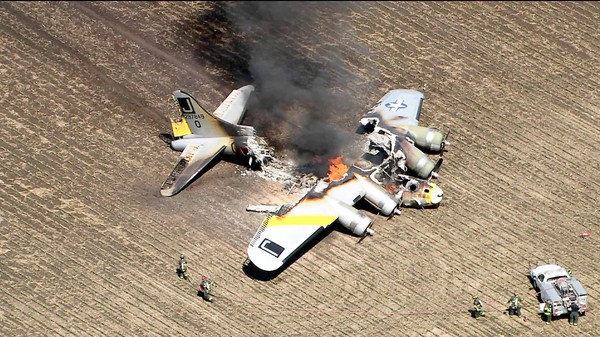
UPDATE: The Liberty Belle caught fire while on a ferry flight yesterday, June 13, 2011. The pilot put her down in a corn field and all seven crew members got out safely. Sadly, she was engulfed in flames and destroyed. My condolences go out to the Liberty Foundation on the loss of their lovely plane and I'm just grateful that the crew got out safely. Photos from the Chicago Tribune
= =
=