Doing It Yourself
05/23/2018
I love that feeling I get when I button up a successful repair! I experience a quiet satisfaction in troubleshooting a problem and working out a solution myself. It doesn't matter whether it is a refrigerator or a TV or a lawnmower or a food processor, it’s a great feeling to use my brains and tools to fix it. In a recent case, the item was a guitar combo amp I bought used.
On the surface the problem really seemed like no big deal: there was a tiny little “sizzle” that would happen on certain notes and sound mechanical, like a rattle. However, I had bought this amp to use in the studio, so no amount of rattle would really be welcome. Besides, it was irritating, even vexing, for this to happen in a newly acquired amp. To start off troubleshooting, I played the amp, created the fizz, and touched every screw head I could find in turn, hoping to find one that stopped rattling with my hand on it. No soap. Then I worked my way through the chassis mount screws, the handle screws, the back-panel screws, the position of the chassis relative to the grille and other parts of the amp, all the while checking the tightness of anything that might vibrate and cause the noise. Next it was time to check the speaker screws. And there I found a big red light: The previous owner had put in a new speaker to get greater power handling capacity and a smoother sound. With a flashlight I could see that one mounting screw was completely missing. Peering in a little more closely I saw the threaded end of the T-nut that held the screw was still visible in the hole.
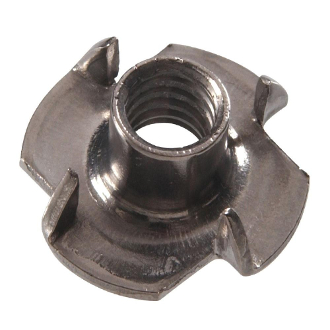
Most production amplifiers use T-nuts to secure the speakers to the speaker board. Rather than a nut with six surfaces to be tightened with a wrench, a T-nut has sharp prongs that secure it to a wood face. During assembly, the center shaft of the nut is slipped into the screw hole and its flat rear face is given a smack with a mallet, driving the nut’s prongs into the wood. The screw is then inserted through the speaker and into the nut from the opposite side of the speaker board. Due to its design, tightening the screw finishes tightening the nut’s prongs into the wood. When I removed the screw and looked into the screw hole from the backside all I could see was a tube with threads on the inside of the screw hole - a T-nut.
I took the amp into a well-lighted workspace and set it up on a table with plenty of space. To get access to the site of the missing screw on this amp I had to remove the back panels, the tube cage, and the 6V6 power tubes. I borrowed another one of the speaker’s mounting screws and ran it down into the hole, engaging the threads of the nut. It rotated freely and never tightened down. A little investigation showed that the T-nut had accidentally been pushed back out of the speaker board far enough to have lost its grip on the wood. Since the speaker cloth is stretched over the front side of the speaker board where the T-nuts enter and anchor, I couldn’t easily reach the T-nut and reset it. Instead, I’d have to make the repair from the back side.
First, I found a new machine screw with the right threads and length in my hardware drawer. It is a good habit to never throw away screws! Then, because I knew I’d be doing some prying and didn't want to mar the frame of the nicely-finished replacement speaker during the repair, I placed a washer over the screw before I inserted the screw into the hole. I slid the washer down to the speaker frame to protect it. Once I got the threads engaged in the T-nut and ran the screw down a bit, I took another washer, a large, thick one, slipped it against the screw body between the first washer and the screw head, and twisted it to wedge the screw’s washer down against the frame of the speaker and pull the head of the screw up. That put pressure on the screw head, and thus on the T-nut prongs on the far side of the speaker board. Keeping the pressure on I ran the screw down with a screwdriver in my other hand. The idea was to keep tension on the prongs of the T-nut up against the speaker board long enough for the process of tightening the screw to force them into the wood. Just as the fat washer became captive under the screw, I eased it out, substituted a thinner washer, and twisted that new washer to keep the pressure on until the prongs were driven further into the wood. As the screw tightened and the prongs dug in further I allowed the washer to be twisted flat by the head of the screw coming down tight. Just as that slim washer began to become captive under the screw head I slipped it out and continued tightening until the screw became tight against the washer and speaker rim.
I buttoned up the rest of the amp, fired it up, and ran it through its paces. Et voila! The rattle was gone, replaced by a nice, clean sound.
That quiet pride and satisfaction rolled over me. A part of the fun was knowing that the minimum bench fee would have probably been about $100 and there would have been hourly fee as well. Fun, pride, and savings. It's a good thing to do it yourself when you can!
= =
=