The Ins and Outs of an Amp Repair
11/12/2018
After forty-eight years I feel like I've finally joined an exclusive fraternity - "those who have fried an amp!" Where's my hat with the antlers? Or perhaps it should be a hat with tubes... Well at least I've survived the initiation. Anyway... a week ago I was playing along merrily in my home studio (and doing so at bedroom volumes, I might add) when suddenly my Marshall JTM60 combo amp went...
HUMMMMMMM... Click...
...and then fell silent. Over the years I've heard rumors that this particular amp design is a lightweight that is prone to overheating. Popular sentiment is that no-one seems to like them, but this little guy had served me virtually flawlessly over its twenty-year life. The clean channel is very clean with a glassy, bright sound something like that of a Marshall JTM-45. The Gain channel is a little razzy for me but I've gotten around that by using external gain. These days I've mostly been using the amp at home as one-half of my stereo FIVE MINUTE REHEARSAL RIG with a Leslie Cabinet but over its life I've also used it at the studio and have performed on stage with it. It had given me no problems before. The power light was still on but I shut the amp down immediately and gave it time to cool before I checked things out. The main fuse was good. The transformers looked pristine, no coloration or leakage. There was no burnt component smell and I hadn't "let the smoke out."
WARNING: Never let the smoke out. Things often won't work right after that.
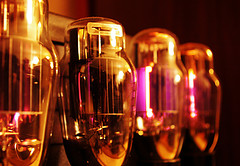
I opened up the tube cage and checked out the pair of original 1995 Huntsville/St. Petersburg Svetlana Electron Devices EL-34s that were mounted horizontally at the bottom of the chassis in the configuration that gave rise to the rumors. Though there was no carbon tracing on the pins or sockets and no hint of singeing on the plates, the silver getter flashing at the crown of one of the tubes had a pretty heavy rainbow halo as though it had seen heat. That same tube had overheated to the point where the top side of the glass envelope melted (!) and deformed inward into a little inverted bubble the size of the end of my thumb. It had to have gotten pretty hot to do that. The tube was obviously zapped. I know, I know: I should have replaced the tubes long ago but I'm used to colder-biased vintage Traynor amps that seem to only use up a pair of EL-34s about once a century.
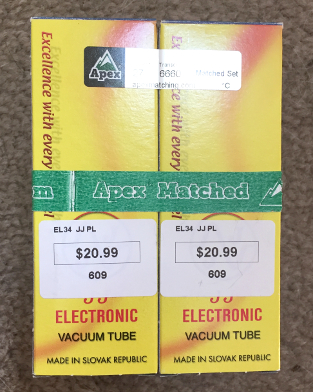
So, a couple of days later I lugged the amp out to the best amplifier tech in the area who came highly recommended to me by my guitar tech. I plunked down the up-front $40 bench fee, crossed my fingers, and dropped off the amp. The tech said he'd call me when the amp was repaired or for a consultation if it looked like the repairs would approach half the value of the amp(!). Five days later I got a call from him that amps was repaired, the price was reasonable, and it was ready to be picked up. His best guess at the cause of the problems was that the power tube had gone bad over time and slowly began overheating. The heat from the tube eventually popped a current-limiting resistor which then blew the protective internal fuse. He installed a new matched pair of power tubes and a new resistor and fuse, biased the amp for the new tubes, and then checked it out completely for me. The 12AX7 preamp tubes tested fine and everything else checked out as well. He and I share the belief that preamp tubes don't croak nearly as fast as power tubes and you don't need to change them until they go bad. Voile'!!! Done. The total bill came to $124.50 including a new pair of Apex Matched, JJ/Tesla EL-34 tubes ($42), the resistor and fuse, and labor. I spent a very pleasant fifteen minutes jaw-jacking with the tech and was on my way. Not bad at all. The amp is now home and happy. I've run it through its paces and it sounds great.
Something new
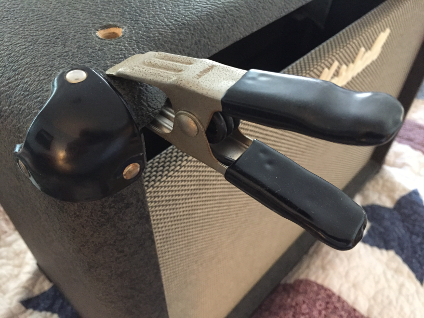
Once I got the amp back, sounding like it was brand new, I felt that it was time to perform a small piece of maintenance work I've wanted to do for a while. The Tolex that wrapped around the top cabinet panel had been slowly disconnecting itself and hanging down over the corners of the gold control panel. It really wasn't a problem but it had nagged at me for years and years and I thought the old girl deserved this little bit of TLC at this point. First, I removed the chassis which was secured by seven screws, including one that went in from the right side. Unscrewing all those was made very easy by the Dewalt power screwdriver my wife gave me for Christmas. Once the chassis was out of the way, I applied E6000 glue to the underside of the Tolex and the panel with a toothpick, pressed the Tolex back into place, and applied a carpenter's spring clamp to each side to hold things while the glue dried.
Once the glue cured, I replaced the chassis, plugged everything back in, function tested it, and put the amp back into service, now looking as great as it sounded! It looks pretty darned good for a twenty-three year old amp, eh?

While the amp was in the shop I had shifted another amp into my "Five Minute Rig" but it really wasn't working nearly as well as my old faithful Marshall. It's funny how you become familiar with certain gear and can just put yourself on autopilot and focus on nothing but your playing. I'm really glad the Marshall is back. It's like comfort food. Hmmmm... Comfort gear. A new idea!!!
Thanks to the folks at AUDIO, LIGHT, & MUSIC for great service.
= =
=
